

Apple moved Mail settings to a brand new location in iPadOS 18. Here is the way to add, take away, and configure accounts in Mail.
iOS and iPadOS used to have a top-level Settings group merely referred to as Mail. From right here, you used to have the ability to add, take away, and alter settings for all of your Mail accounts.
In iPadOS 18, Apple has moved these Settings to the very backside of the Settings listing beneath a row merely referred to as Apps.
To entry your Mail settings or so as to add and take away Mail accounts, you will have to go to Settings->Apps->Mail.
Including new Mail accounts in iPadOS 18
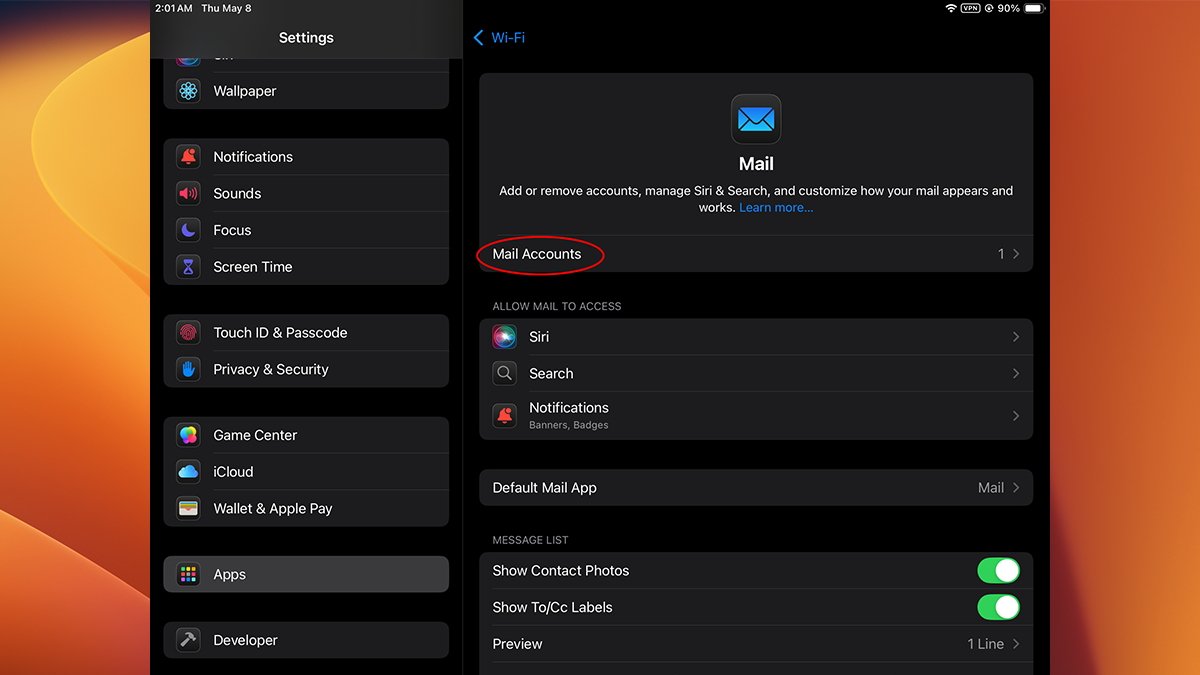
So as to add a brand new Mail account in iPadOS 18, choose Settings->Apps->Mail->Mail Accounts.
Observe that as of iPadOS 18.4.1, there’s a bug that labels the again button on the prime as “Wi-Fi’ when it ought to learn “Mail”.
Choose Apps->Mail in Settings so as to add a brand new Mail account.
On the subsequent pane, if you have not already arrange any third-party accounts, you will have two choices: iCloud or Add Account. In case you’ve already logged into your Apple Account and enabled iCloud Mail, it is going to be obtainable mechanically.
If you wish to add a brand new, non-iCloud Mail account, faucet Add Account. This opens the account sort pane:

Faucet “Add Account”.
Right here, you’ll be able to add an current account for iCloud mail, Microsoft Alternate, or Outlook, and in addition web-based mail for Google, Yahoo!, or AOL. See the documentation for every of those providers to discover ways to configure their mail accounts on iPad and different gadgets.
You probably have a privately hosted mail account on an IMAP or POP mail server, choose Different. This lets you add a generic mail account along with your ISP’s or inner mail server.

Choose the brand new mail account sort you wish to add.
On the “Different” Add Account pane, you’ll be able to add a brand new mail account, an LDAP or CardDav contact, or a CalDAV or different sort of shared calendar.
So as to add a brand new IMAP or POP mail account, faucet Add Mail Account:

Faucet “Add Mail Account” so as to add a brand new generic mail account.
This opens the New Account sheet, by which you could fill out a minimum of the primary three fields:
- Title
- Password
The fourth area, Description, is non-obligatory. When all of the fields are crammed out, faucet the Subsequent button.
On the subsequent sheet on the prime, you’ll be able to choose both IMAP or POP. Most fashionable mail servers use IMAP, so until there is a particular purpose you should use POP, choose IMAP.
IMAP has the benefit of having the ability to mechanically sync messages on an IMAP mail server throughout a number of gadgets utilizing the identical mail account. iPadOS selects IMAP because the default for you.
Subsequent, you will have to enter the incoming and outgoing mail server data, together with host identify(s), consumer identify(s), and passwords. Some ISPs use the identical server for each incoming and outgoing mail, however some do not. Test along with your ISP for server settings.
Many personal ISPs will present an inner server host identify mapping so {that a} area you bought along with your ISP maps to the incoming mail server host identify. For instance, in case your area identify is mywidgetcompany.com your ISP might present a mail server identify mapping of mail.mywidgetcompany.com.
Your mail server consumer identify(s) and password(s) will even have been supplied to you by your ISP on the time you signed up.
When all of the mail server data is crammed out in your iPad, faucet the Subsequent button. iPadOS will attempt to contact the server to confirm the server and consumer data, and if profitable, your new mail account might be added to your iPad.
In case you arrange an IMAP mail account, you will see one ultimate sheet with two switches on it: Mail (on by default), and Notes (off by default). You’ll be able to allow the Notes change in case your ISP gives that service.
When carried out, faucet the Save button.
In case you like, you’ll be able to later go to the mail server settings pane and set superior mail account and server settings.
iPadOS will shut the Add Account sheet and you will be redirected again to the top-level Mail Accounts pane. Repeat the method for every mail account you wish to add.
Once you run the iPadOS Mail app out of your iPad’s dwelling display, it is going to mechanically fetch any mail from the accounts you added above.
Eradicating and Configuring Mail accounts in iPadOS 18
Eradicating a Mail account in iPadOS 18 is much like setting it up. From the Mail Accounts pane, faucet the mail account you wish to take away, then on the backside of the subsequent pane faucet Delete Account
On this pane, you may as well change the show label for the Mail account and switch the Mail and Notes switches on or off. You too can faucet Account Settings to enter extra superior account choices, together with Easy Mail Switch Protocol (SMTP) settings, further SMTP servers, SSL (encryption), port quantity, and Authentication choices.
Many personal ISPs use customized UNIX port numbers for mail communication with the intention to thwart attackers. Your ISP will often present customized port info in your sign-up affirmation electronic mail, if wanted.
In the event that they did, faucet the Account Settings->SMTP->Main Server->Server Port row, or the Account Settings->Superior->Server Port row beneath “Incoming Settings”.
Additionally on the Account Settings->Superior pane, you’ll be able to enter S/MIME signing and certificates data beneath the Signal and Encrypt by Default rows. MIME is an acronym for Multipurpose Web Mail Extensions, which defines using non-ASCII textual content in addition to some attachments in electronic mail messages.
Of explicit significance in MIME are model quantity, content material sort, encoding, encryption, and utility sort header info. Most often, you will not want to vary the default S/MIME settings in iPadOS.
S/MIME (Safe/Multipurpose Web Mail Extensions) is much like MIME besides that it makes use of Public Key Infrastructure (PKI) to signal MIME information.
Total, Apple makes including mail accounts simple on iPadOS as soon as you recognize what all of the fields are for. Automated verification with the mail server ensures accounts might be arrange appropriately and securely.